How to Submit Your Website Sitemap to Google Search Console
You've built your website — but Google has no idea it exists yet. That's where a sitemap comes in. A sitemap is a roadmap of your entire website that tells Google: "Here are all my pages — please come crawl them!"
In this guide, you'll learn exactly how to find or generate your sitemap, and submit it to Google Search Console so your website starts appearing in Google search results as quickly as possible.

WHY THIS MATTERS
Why This Matters: Without submitting a sitemap, Google may take weeks or even months to find your website. Submitting a sitemap can speed up indexing to just a few days — completely free!
1. What is a Sitemap?
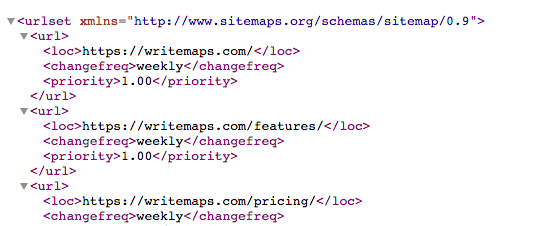
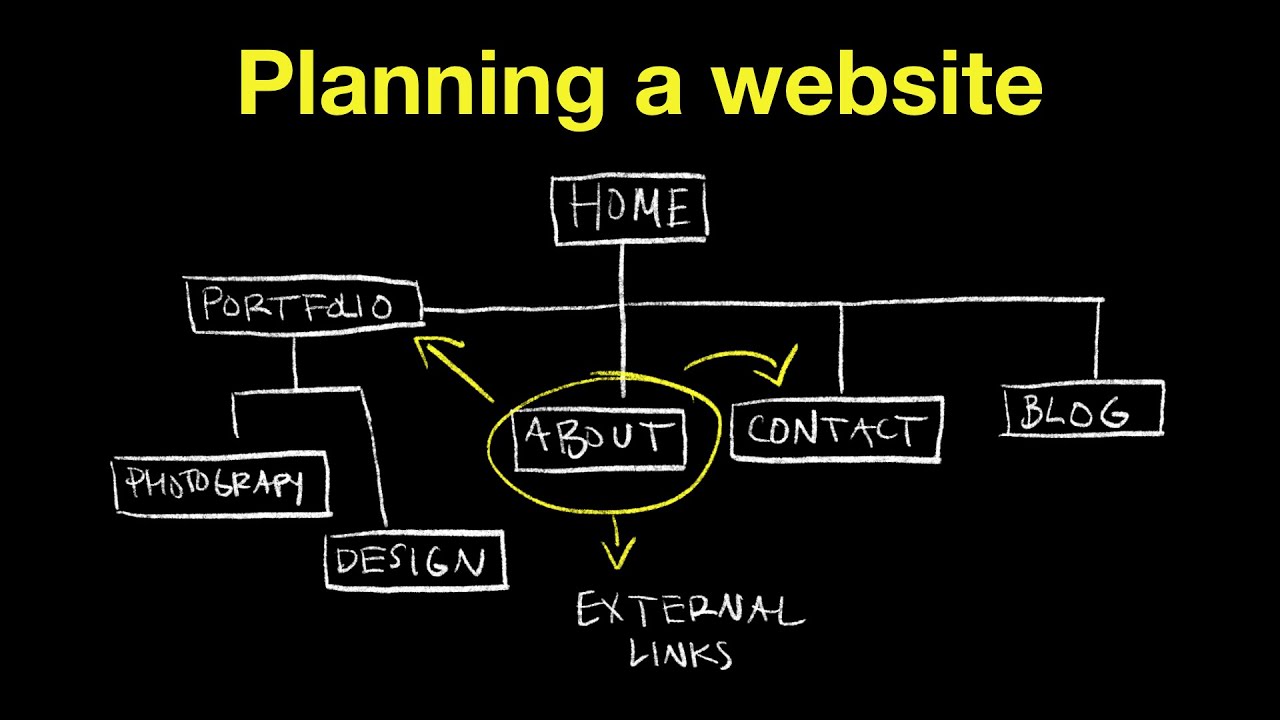
A sitemap is an XML file that lists all the important pages, posts, images, and videos on your website. It acts like a blueprint that helps Google's crawlers — called Googlebot — navigate your website efficiently. Think of it like a table of contents for your website, but written in a language that Google understands.
There are three main types of sitemaps:
a. XML Sitemap (sitemap.xml) — The standard format for search engines. This is what you will submit to Google.
b. HTML Sitemap (sitemap.html) — A human-readable page listing all your pages. Helpful for users, but NOT what Google Search Console needs.
c. Sitemap Index (sitemap_index.xml) — A master sitemap that links to multiple smaller sitemaps. Used by large websites with thousands of pages.
2. How to Find Your Website’s Sitemap URL
Most modern website platforms automatically generate a sitemap for you. Check these common URLs by typing them directly in your browser:
a. WordPress: yoursite.com/sitemap_index.xml or yoursite.com/wp-sitemap.xml
b. Shopify: yoursite.com/sitemap.xml
c. Wix: yoursite.com/sitemap.xml
d. Squarespace: yoursite.com/sitemap.xml
e. Webflow: yoursite.com/sitemap.xml
f. Custom HTML Site: You need to generate one manually — see Section 3 below
Pro Tip: Many websites also list their sitemap inside the robots.txt file. Visit yourwebsite.com/robots.txt and look for a line that says: Sitemap: https://...
3. How to Generate a Sitemap (If You Don’t Have One)
Option A
WordPress Users (Yoast SEO Plugin)
Install Yoast SEO Plugin: Go to WordPress Dashboard → Plugins → Add New → Search “Yoast SEO” → Install and Activate. It is completely free.
Enable XML Sitemaps: Go to Yoast SEO → Settings → XML Sitemaps → Toggle ON. Your sitemap is now live at yoursite.com/sitemap_index.xml
View Your Sitemap: Click “View the XML Sitemap” button to confirm it is working. You should see a list of URLs in XML format.
Option B
Free Online Sitemap Generators
If you have a custom HTML site or any platform that does not auto-generate sitemaps, use these free tools:
XML-Sitemaps.com — Free for up to 500 pages. Enter your URL and download the XML file instantly.
Screaming Frog SEO Spider — Desktop app, free up to 500 URLs. Very powerful and accurate. (screamingfrog.co.uk)
Slickplan — Visual sitemap builder with XML export. (slickplan.com)
Option C — Upload Sitemap to Your Server
Once you have the sitemap.xml file, upload it to the root directory of your website using FTP software like FileZilla, or through your hosting control panel (cPanel File Manager). The file must be accessible at exactly https://yoursite.com/sitemap.xml
4. How to Verify Your Sitemap is Valid
Before submitting to Google, make sure your sitemap is properly formatted. Open your sitemap URL in a browser — it should display structured XML code, not a blank page or error.
COMMON MISTAKES TO AVOID
URLs must be absolute — use the full address like https://yoursite.com/about, not just /about
HTTPS must be consistent — if your site uses HTTPS, all sitemap URLs must start with https://
Do not include pages marked with noindex or blocked in robots.txt
Sitemap cannot exceed 50MB or 50,000 URLs — use a sitemap index file for larger sites
You can also validate your sitemap at validator.w3.org to catch any XML formatting errors before submission.
5. Setting Up Google Search Console
Google Search Console (GSC) is a completely free tool by Google that lets you monitor and manage your website’s presence in Google Search. You need a Google or Gmail account to use it.
- Step - 1: Go to Google Search Console: Visit search.google.com/search-console and sign in with your Google account.
Step - 2: Click “Start Now”: If it is your first time, click the Start Now button on the welcome screen.
Step - 3: Choose URL Prefix Property Type: You will see two options — Domain and URL Prefix. For most beginners, choose URL Prefix and enter your full website URL like https://www.yoursite.com — then click Continue.
ℹ️ NOTE
Domain vs URL Prefix: Domain property covers http, https, and all subdomains but requires DNS verification which is more advanced. URL Prefix is easier to verify and perfect for beginners.

6. Verifying Your Website Ownership
Google needs to confirm you actually own the website. There are several verification methods available:
HTML Meta Tag (Recommended for beginners) — Copy a meta tag from GSC and paste it into the head section of your homepage.
HTML File Upload — Download an HTML file from GSC and upload it to your website’s root folder via FTP or cPanel.
DNS Record — Add a TXT record to your domain’s DNS settings via your registrar such as GoDaddy or Namecheap.
Google Analytics — If Google Analytics is already installed on your site, verification is instant.
Google Tag Manager — If GTM is live on your site, GSC can verify through it automatically.
Verification via HTML Meta Tag — Step by Step
- Select “HTML Tag” in GSC: After entering your URL, click HTML tag verification and copy the entire meta tag shown to you.
- Paste it in your website’s head section: Open your homepage and paste the tag just before the closing head tag. In WordPress, use Yoast SEO under the Webmaster Tools tab, or use the plugin “Insert Headers and Footers.”
- Click “Verify” in GSC: Go back to Google Search Console and click Verify. If the tag is found on your page, you will see a green success confirmation message.
![How To Verify Ownership for Google Search Console on WordPress [2024]](https://i.ytimg.com/vi/ikDkA6XnDUs/hq720.jpg?sqp=-oaymwEhCK4FEIIDSFryq4qpAxMIARUAAAAAGAElAADIQj0AgKJD&rs=AOn4CLCm2L8fvLo2zJSdWKfVMu7F6Qv7kw)
7. Submitting Your Sitemap to Google — The Main Step!
Once your website is verified in Google Search Console, submitting your sitemap takes less than 2 minutes. Follow these steps carefully:
i. Open Google Search Console: Visit search.google.com/search-console and make sure you are viewing your verified website property selected in the top-left dropdown.
ii. Click “Sitemaps” in the Left Sidebar: In the left navigation menu, find the Indexing section and click on Sitemaps.
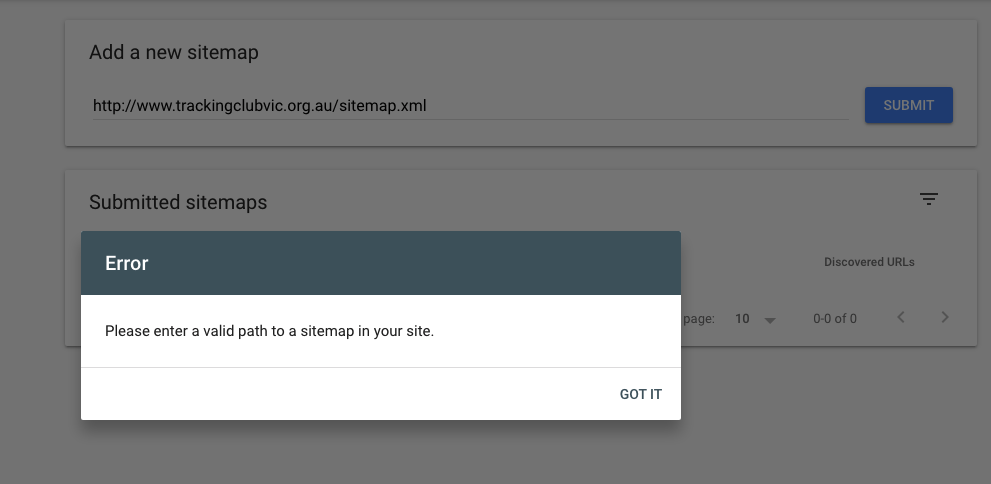
iii. Enter Your Sitemap URL: You will see a text field showing your base URL. In the empty box next to it, simply type: sitemap.xml or sitemap_index.xml
iv. Click the Submit Button: Google will immediately fetch your sitemap and validate it. The result appears within a few seconds.
v. Check the Status: You should see a green Success status. This means Google has accepted your sitemap and will begin crawling your pages. GSC will also show how many URLs were discovered.
✅ IMPORTANT
After a successful submission, do not delete or move your sitemap file. Google will keep coming back to it regularly to check for new or updated pages on your website.

8. What Happens After Submission?
After submitting your sitemap, Google’s crawlers will visit the URLs listed and decide which pages to add to Google’s search index. Here is the typical timeline:
a. Within 24 to 48 Hours: Google fetches your sitemap and starts crawling your pages. Initial data begins to appear in GSC under the Pages section.
b. Within 1 to 2 Weeks: Most pages on a new website start getting indexed. Coverage data becomes visible in Google Search Console.
c. Within 1 to 3 Months: Pages start appearing in Google Search results. Rankings improve as Google evaluates your content quality and relevance.
d. To monitor your progress, go to Google Search Console → Indexing → Pages. This shows how many URLs have been indexed versus those still pending or with errors.
💡 PRO TIP
Keep Your Sitemap Updated: Every time you add a new page or blog post, make sure your sitemap is updated. WordPress with Yoast SEO does this automatically. Static sites need to regenerate and re-upload the sitemap manually.

9. Troubleshooting Common Errors
Error: Couldn’t Fetch
Cause: Google couldn’t access your sitemap URL at all.
Fix: Type the full sitemap URL in a new browser tab and check it loads. Also check that your robots.txt file is not blocking Googlebot.
Error: Sitemap Could Not Be Read or Parse Error
Cause: Your XML sitemap has formatting errors or invalid characters.
Fix: Validate your sitemap at validator.w3.org. Make sure there are no unclosed XML tags or special characters.
Error: URLs Submitted But Not Indexed
Cause: Google found your pages but chose not to index them due to thin content, duplicate pages, or noindex tags.
Fix: Check that your pages do not have a noindex meta tag. Improve content quality and make sure each page offers unique, valuable information.
Warning: Pages Submitted But Excluded
Cause: Pages are blocked in robots.txt, have redirect issues, or have canonical tag mismatches.
Fix: Review your robots.txt file. Use the URL Inspection tool in GSC on specific pages to see exactly why they were excluded.
